

-
- No Comments
- November 24, 2025
How to freeze frame in Davinci Resolve 18
I. Introduction
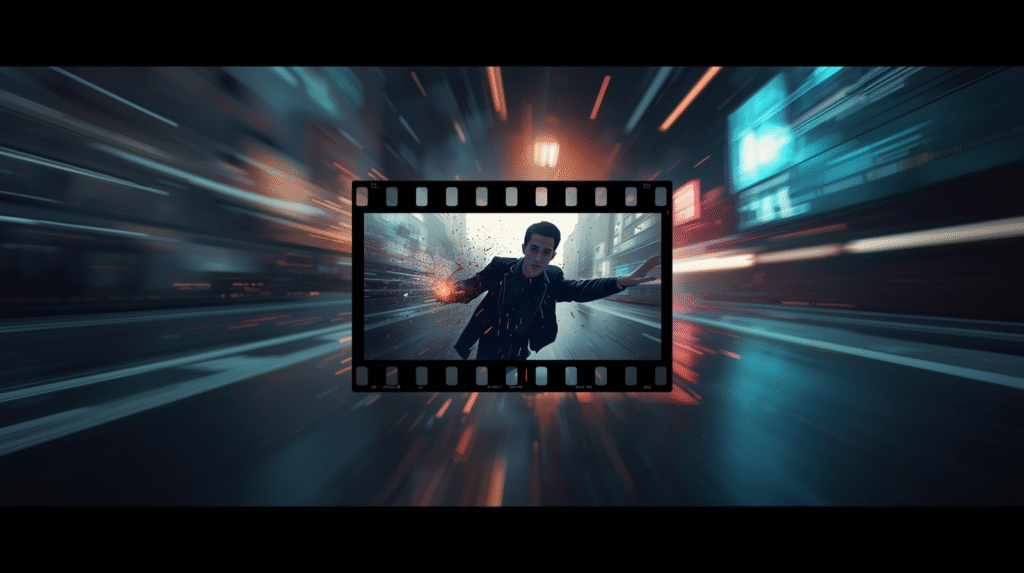
Freeze frames are one of those classic editing tricks that never go out of style. They let you pause time literally locking a single moment on screen to highlight emotion, emphasize action, or create a clean visual cue for narration or graphics. Whether you’re breaking down a tutorial, adding a comedic pause, or building a dramatic moment, a well-executed freeze frame can instantly elevate the storytelling of your video.
DaVinci Resolve 18 makes this process surprisingly flexible. Instead of relying on just one method, Resolve gives editors multiple ways to create a freeze frame each offering a different level of precision, control, and creative freedom.
In this guide, you’ll get a complete step-by-step breakdown of the three main methods: the quick Freeze Frame command, the advanced Retime Controls technique, and the still-frame export approach for more stylized edits. By the end, you’ll know exactly which method suits your project and how to use each one effectively.
II. What Is a Freeze Frame in DaVinci Resolve 18?

A freeze frame is simply a single frame of your video held on screen for a chosen duration. Instead of the footage continuing to play, the motion stops letting that exact moment lock in place. It’s like taking a snapshot directly inside your timeline and using it as part of your video.
Editors use freeze frames for a variety of reasons:
- Highlighting important visual details in tutorials
- Creating dramatic pauses in storytelling
- Adding stylized or cinematic effects
- Pausing the action for on-screen text, graphics, or narration
- Emphasizing emotional or comedic beats
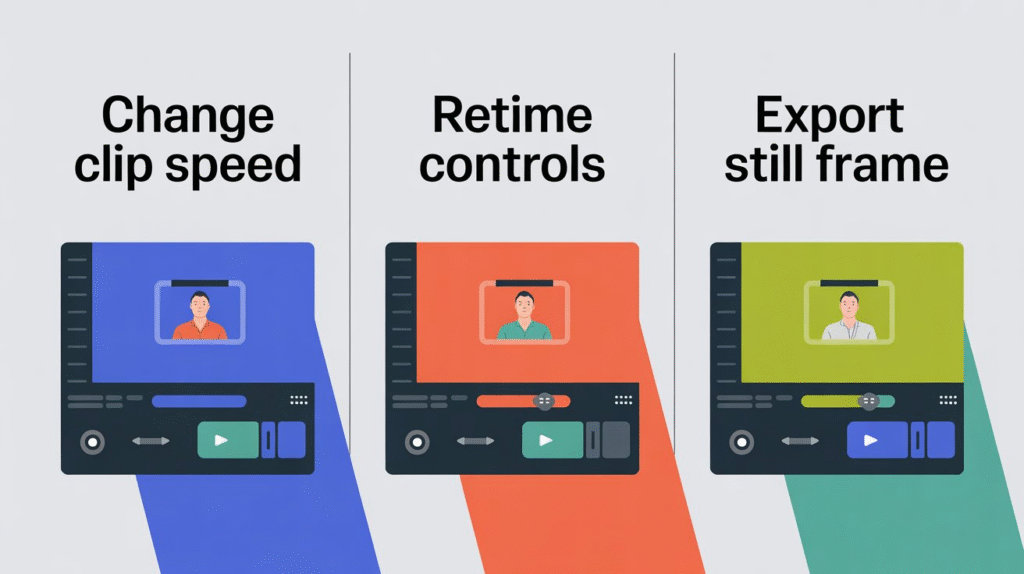
In DaVinci Resolve 18, you can create freeze frames through three main techniques:
- Change Clip Speed (Freeze Frame command) — Fast and straightforward.
- Retime Controls — Ideal for speed ramps and smooth transitions.
- Export Still Frame — Best for design-heavy or stylized visuals.
Each method has its own strengths, and this guide will walk you through all of them in detail.
III. Method 1 — Freeze Frame via Change Clip Speed

3.1 Overview
The Change Clip Speed method is the simplest and fastest way to create a freeze frame in DaVinci Resolve 18. It’s perfect when you want a clean, straightforward hold on a specific moment without needing speed ramps or advanced timing control. If you’re making tutorials, explanatory videos, or moments where the frame simply needs to pause and stay still, this method gets the job done with minimal steps and zero complications.
3.2 Step-by-Step Instructions
Follow these steps to create a freeze frame using the Change Clip Speed option:
- Move the playhead to the exact frame you want to freeze.
- Right-click the clip at that position.
- Select Change Clip Speed from the menu.
- In the popup window, check the “Freeze Frame” option.
- Click Change to apply the freeze.
Resolve will instantly turn that exact frame into a still that lasts for the remaining duration of the clip.
Adjusting the Length of the Freeze Frame
- Hover over the end of the clip on your timeline.
- Trim the edge inward or outward to shorten or lengthen the duration of the freeze.
- The freeze frame behaves like any other clip segment, so you can move or extend it freely.
3.3 Pros & Cons
✔ Pros
- Extremely quick and beginner-friendly.
- Produces a clean, stable freeze frame with almost no setup.
- Great for simple pauses or instructional overlays.
✘ Cons
- Limited flexibility—no speed ramps or transitional smoothing.
- Not ideal if you need advanced timing adjustments or animated transitions.
IV. Method 2 — Freeze Frame Using Retime Controls
4.1 Overview
If you want full creative control over how your freeze frame behaves, especially when blending it into speed ramps or cinematic transitions the Retime Controls method is the one to use. This approach gives you far more flexibility than a simple freeze command. You can control how the clip slows down, when it freezes, and how smoothly it returns to normal speed. It’s ideal for action sequences, stylized edits, music videos, or any moment where timing and motion matter.
4.2 Step-by-Step Instructions
Follow these steps to create a freeze frame using Retime Controls:
- Cut the clip at the exact frame where you want the freeze (Ctrl + B / Cmd + B).
- Right-click the clip segment and choose Retime Controls — or press Cmd + R/Ctrl + R.
- A retime bar will appear above your clip.
- Click the dropdown arrow under the chosen segment.
- Select Freeze Frame from the menu.
You’ll see a red bar appear, indicating the frozen frame.
Adjusting the Duration
- Drag the end of the red bar left or right to shorten or extend how long the freeze frame stays on screen.
- You can still cut, move, or retime surrounding sections as needed.
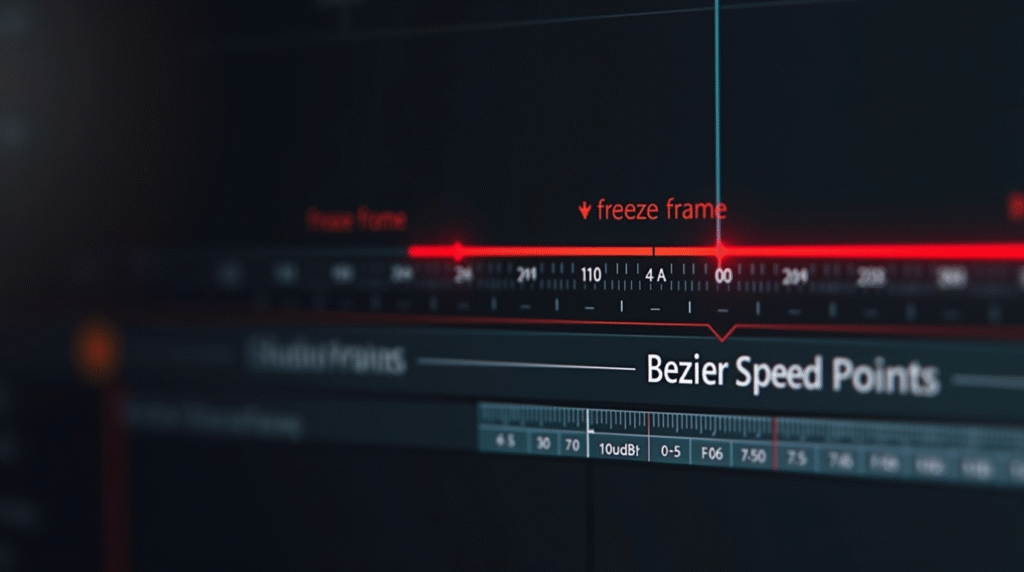
4.3 Advanced Retime Tips
• Smooth Transitions with Bezier Speed Points
- Right-click speed points and switch them to Bezier for softer easing.
- This prevents abrupt jumps when entering or exiting the freeze.
• Use the Speed Graph for Precision
- Expand the retime curve.
- Adjust the handles to fine-tune ramps leading into the freeze.
- Perfect for cinematic slow-motion → freeze → speed-recovery sequences.
These tools give you far more crafting power than the basic freeze method.
4.4 Pros & Cons
✔ Pros
- Maximum control over timing and motion.
- Ideal for speed ramps, dynamic edits, or stylized transitions.
- Lets you create polished, cinematic freeze sequences.
✘ Cons
- Slightly more complex for beginners.
- Requires more steps than the quick Change Clip Speed method.
V. Method 3 — Exporting a Still Frame
5.1 Overview
The Export Still Frame method is the go-to option when you need complete creative freedom. Instead of freezing the frame directly in the timeline, you extract a high-quality still image and use it like any other clip. This makes it perfect for stylized edits, motion graphics, VFX-heavy scenes, or anything that requires advanced compositing. If your project involves zoom effects, background removal, cutout animations, or multi-layered visuals, this method delivers the strongest control.
5.2 Step-by-Step Instructions
Here’s how to create a freeze frame by exporting a still:
- Navigate to the exact frame you want to freeze in the timeline.
- Right-click the viewer and select Grab Still (or use the Gallery panel).
- The still image will appear in your Gallery.
- Right-click the still and choose Export to save it as an image file.
- Import the exported image back into your Media Pool.
- Drag the image onto your timeline and place it where you want the freeze frame to occur.
- Extend the duration of the still clip as needed.
This creates a perfect frame hold—completely independent of your original footage.
5.3 Creative Uses
This method opens doors to effects that aren’t possible with standard freeze tools:
• Background Removals
Remove the background from the still frame using Fusion or external tools, then animate the subject separately.
• Duplicate Layers for Stylized Effects
Stack multiple still images on top of each other to create pop-art effects, motion trails, or graphic-style transitions.
• Cutout Freeze Frame Sequences
Create “freeze-and-zoom” or “comic book cutout” animations by isolating the subject and adding bold outlines or motion elements.
These creative possibilities make this method popular in music videos, sports edits, and TikTok/Reels-style content.
5.4 Pros & Cons
✔ Pros
- Maximum flexibility for effects and compositing.
- Perfect for creative, stylized, or design-heavy edits.
- Allows independent manipulation of the frozen frame.
✘ Cons
- Requires more manual steps than the other methods.
- Not ideal if you only need a quick, simple freeze frame.
VI. Pro Tips for Better Freeze Frames
Creating a freeze frame is easy but creating a smooth, professional-looking freeze frame takes a bit more finesse. These pro tips will help you get cleaner transitions, better visual quality, and more dynamic results in DaVinci Resolve 18.
• Use Bezier Speed Points for Smoother Starts and Ends
When working with Retime Controls, switch speed points to Bezier.
This softens the ramp into and out of the freeze, preventing those harsh, robotic jumps that can break the flow of your edit.
• Adjust Motion Estimation + Frame Interpolation
In your Project Settings → Master Settings, experiment with:
- Motion Estimation Mode
- Retime Process / Frame Interpolation
These settings help Resolve generate smoother motion when transitioning into a freeze frame, especially when slow motion or speed ramps are involved.
• Use “Render in Place” for Smoother Playback
Freeze frames especially with retime adjustments can sometimes lag during editing.
Right-click your freeze frame clip and choose Render in Place.
This improves playback and prevents timeline stutter, making your workflow much smoother.
• Duplicate Freeze Clips for Dynamic Effects
Want stylized edits? Duplicate your freeze frame image or clip to create:
- Zoom-pop sequences
- Graphic overlays
- Multi-layered motion trails
- Split-screen freeze effects
This transforms a simple freeze frame into a standout moment.
VII. Common Freeze Frame Mistakes to Avoid
Even experienced editors slip up when working with freeze frames. Here are the most common pitfalls—so you can skip them.
• Forgetting to Cut Before Using Retime Controls
If you don’t cut the clip at the right frame before applying the freeze, you may freeze the wrong section or affect the whole clip unintentionally.
• Applying the Freeze on the Wrong Frame
The freeze frame is based on your exact playhead position.
A tiny misplacement—even one frame off—can completely change the look of your moment.
Always zoom in and double-check before applying.
• Not Extending the Freeze Long Enough
If the freeze is too short, your pacing will feel rushed.
Always match the length of the frozen moment with:
- The beat of your music
- The timing of your narration
- Your overall scene rhythm
A well-timed freeze frame can make all the difference in your storytelling.
VIII. Additional Resources Used
To ensure this guide delivers accurate, practical, and up-to-date information on freeze frames in DaVinci Resolve 18, the following resources were referenced:
- Tutorial video by Alex Cameron — A comprehensive walkthrough covering multiple freeze frame techniques and retime strategies.
- Edits 101 deep-dive — Step-by-step examples highlighting both basic and advanced freeze frame methods.
- Official DaVinci Resolve Manual — Verified instructions straight from Blackmagic Design’s documentation.
- Miracamp Freeze Frame Guide & Chop’n Prep Tutorial — Simplified written tutorials with clear use cases and workflow tips.
IX. Related Guides (Internal Links Section)
Looking to build more advanced editing skills in Resolve? These closely related guides will help you expand your toolkit:
- Creating Cinematic Freeze Frames in Resolve 18
- Adding Motion Blur to Freeze Frames
- Best Way to Export Still Images in Resolve
- Combining Freeze Frames with Zoom & Crop Effects
- Troubleshooting Freeze Frame Issues in Resolve 18
X. Conclusion
Freeze frames are one of the simplest yet most powerful tools in video editing—and DaVinci Resolve 18 gives you several ways to use them effectively.
You now know:
- How to create quick freezes with Change Clip Speed
- How to build cinematic freezes using Retime Controls
- How to craft stylized VFX-ready freezes by exporting still images
Each method serves a different purpose:
- Method 1 is best for fast, no-fuss tutorials or clean pauses.
- Method 2 gives you full timing control—perfect for speed ramps and cinematic edits.
- Method 3 is ideal when you want creative freedom with effects, cutouts, or layered visuals.
With these tools in your workflow, you can transform simple moments into polished, dramatic storytelling beats. Experiment with retime curves, Bezier easing, and advanced interpolation to take your freeze frames to the next level.
Frequently Asked Questions (FAQ)
1. What is a freeze frame in DaVinci Resolve 18?
A freeze frame is a single frame of video held on screen for a set duration. It’s used to pause motion, highlight key moments, or create dramatic, comedic, or tutorial effects in your project.
2. Which method should I use to create a freeze frame?
- Change Clip Speed: Quick and simple freezes.
- Retime Controls: Full control for speed ramps and smooth transitions.
- Export Still Frame: Best for stylized edits, VFX, or layered compositions.
3. Can I adjust the duration of a freeze frame?
Yes! For Change Clip Speed, trim the clip length. With Retime Controls, drag the red bar to extend or shorten the freeze. For exported still frames, simply adjust the still image clip duration in the timeline.
4. How can I make freeze frames look smoother?
Use Bezier speed points for smooth entry and exit, adjust motion estimation and frame interpolation in project settings, and consider Render in Place to avoid playback stutter.
5. Are freeze frames suitable for advanced effects?
Absolutely! Using the Export Still Frame method, you can apply effects, remove backgrounds, duplicate layers, and create stylized or cinematic sequences that go far beyond simple frame holds.


