
-
- No Comments
- December 10, 2025
How do i connect my shark robot to wifi
1. Introduction
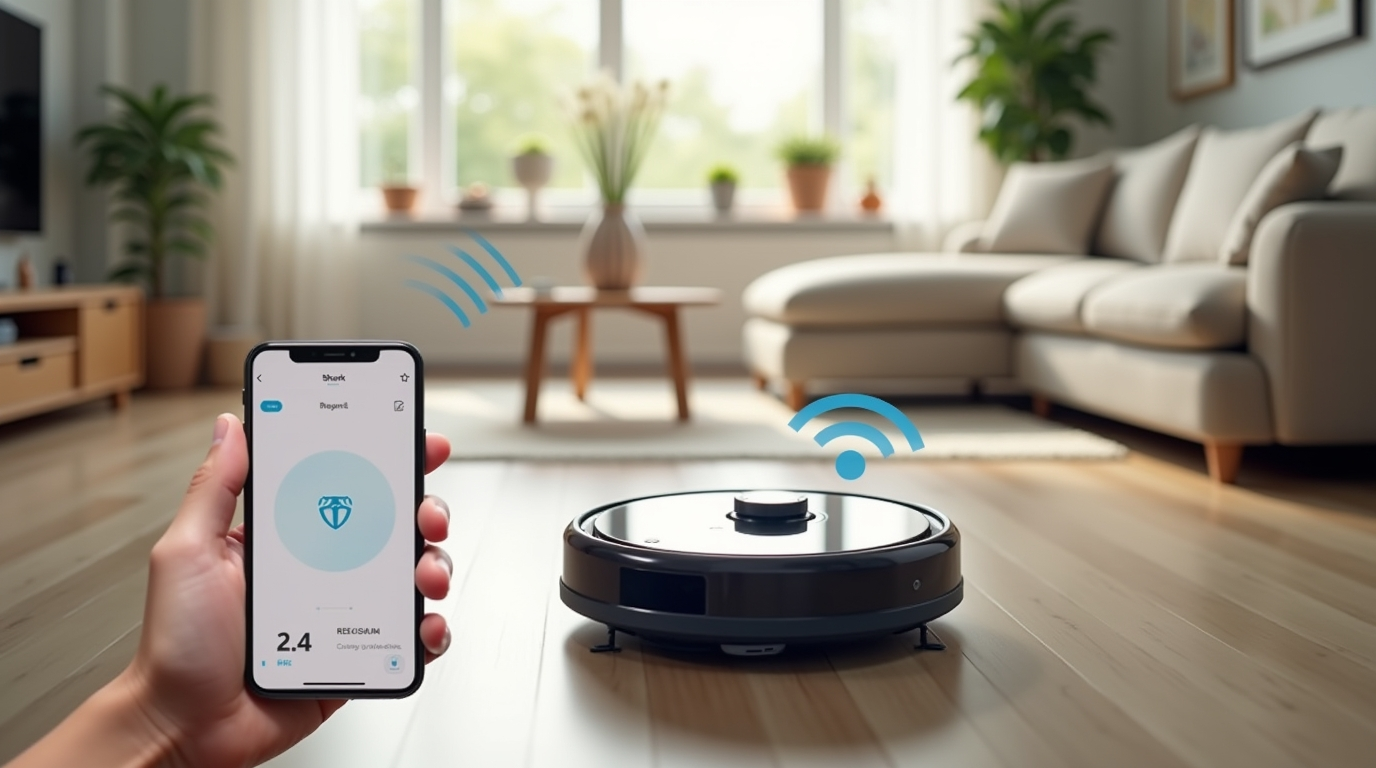
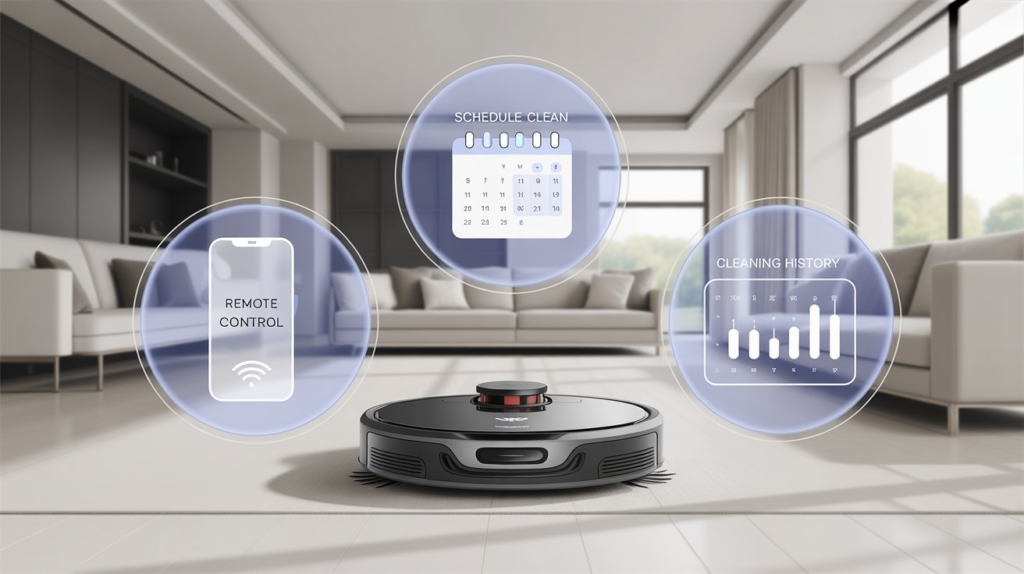
Connecting your Shark Robot vacuum to WiFi transforms it from a simple cleaning device into a smart home assistant. With WiFi connectivity, you gain complete control over your robot right from your smartphone no matter where you are. This connection unlocks powerful features like scheduling cleanings at your convenience, monitoring cleaning history, receiving automatic firmware updates, and even remotely starting or pausing your robot.
In this guide, we’ll walk you through every step of connecting your Shark Robot to WiFi, making the setup process as smooth and hassle-free as possible. Whether you’re pairing your robot for the first time or reconnecting it to a new network, you’ll be able to get it online quickly and easily.
2. What You’ll Need Before You Start
Before diving into the setup, make sure you have the following essentials ready:
- Shark Robot – fully charged and ready for setup.
- Smartphone – with the SharkClean app installed (available on iOS App Store and Google Play Store).
- Active WiFi network – ensure it’s a 2.4 GHz network, as Shark Robots generally do not support 5 GHz connections.
- Shark account – either log in with an existing account or create a new one in the app.
Having these items prepared will make the WiFi connection process faster and smoother, preventing any unnecessary delays.
3. Preparing Your Shark Robot
Before you start connecting your Shark Robot to WiFi, preparation is key to avoid setup issues.
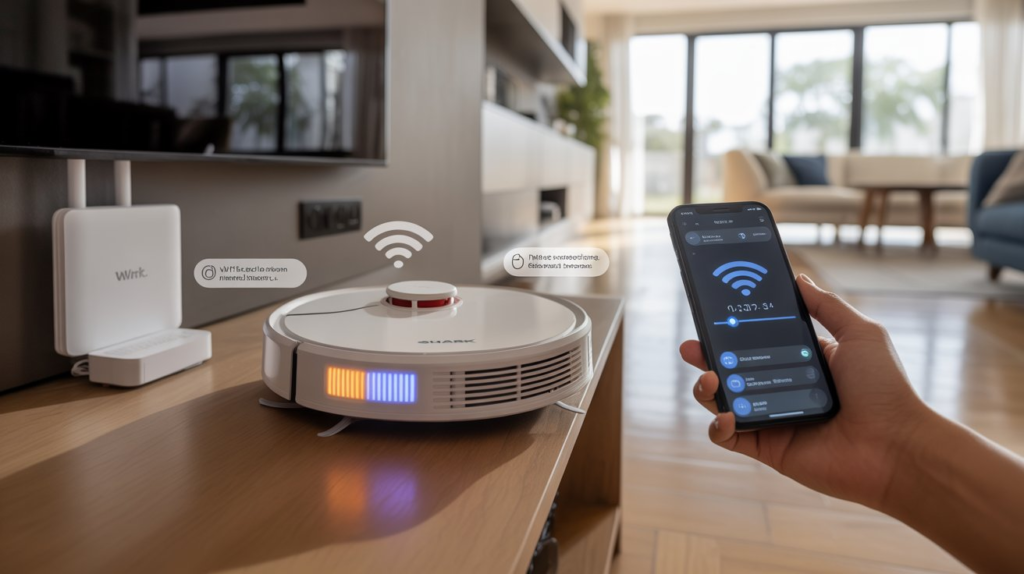
- Position your robot near the WiFi router: Being close to the router ensures a strong signal during the initial setup. Weak signals can cause connection failures.
- Check the battery level: Make sure your Shark Robot is fully charged. A low battery might interrupt the pairing process, forcing you to start over.
By taking these simple preparation steps, you’ll save time and make the WiFi connection process smoother.
4. Installing and Setting Up the SharkClean App
The SharkClean app is essential for controlling your robot and connecting it to your WiFi network. Here’s how to get started:
- Download and install the app: Available on the iOS App Store and Google Play Store.
- Create or log into a Shark account: Open the app and either sign up for a new account or log in to an existing one.
- Familiarize yourself with the interface: The app’s main dashboard allows you to add new robots, manage cleaning schedules, view cleaning history, and access robot settings. For WiFi setup, the relevant section is usually labeled “Add a Robot” or “Set Up a New Shark”.
Having the app ready and your account set up ensures you’re prepared for the next step: pairing your robot with your network.
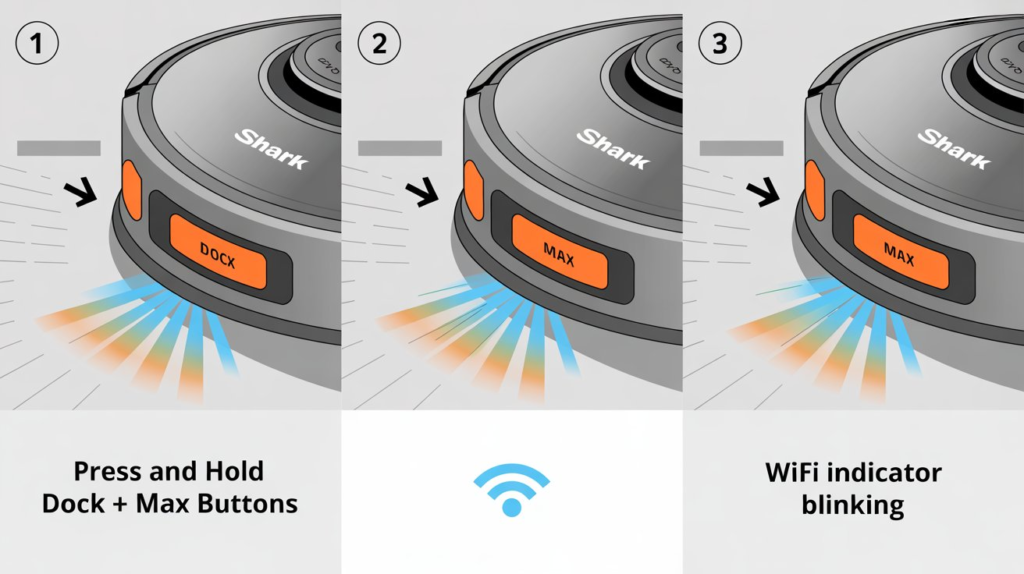
5. Putting Your Shark Robot in WiFi Pairing Mode
To connect your Shark Robot to WiFi, it needs to be in pairing mode. Follow these steps carefully:
- On the Shark Robot, press and hold the “Dock” and “Max” buttons simultaneously.
- Keep holding until the indicator lights start blinking.
What the blinking lights mean:
- A blinking light indicates that the robot has entered WiFi setup mode and is ready to connect to your network.
- If the lights do not blink, ensure the robot is charged and try pressing the buttons again.
Once your robot is in pairing mode, it’s ready to be connected through the SharkClean app.
6. Connecting Through the SharkClean App
Once your Shark Robot is in WiFi pairing mode, follow these steps in the SharkClean app to complete the connection:
- Navigate to “Add a Robot” or “Set Up a New Shark”: Open the app and select the option to add a new device.
- Select your home WiFi network: Make sure to choose your 2.4 GHz network, as Shark Robots typically do not connect to 5 GHz networks.
- Enter your WiFi password carefully: Double-check for typos to prevent connection errors.
- Name your robot: Assign a unique name for easy identification. If reconnecting an existing robot, use the same name to maintain profile continuity.
- Complete the setup and allow updates: The app will finish connecting your robot to WiFi and may prompt updates. Let the robot update its settings; this usually takes a minute.
Once connected, your Shark Robot is ready to be controlled remotely, scheduled, and updated automatically.
7. Troubleshooting Common Connection Issues
If your Shark Robot fails to connect to WiFi, try these solutions:
- Router issues: Ensure your WiFi router is working and broadcasting properly. Reboot it if necessary.
- Proximity: Move the robot closer to the router during setup for a stronger signal.
- Network band issues: Separate your 2.4 GHz and 5 GHz networks to avoid band steering conflicts.
- Password errors: Verify that you’ve entered the correct WiFi password.
- Reboot both devices: If the robot still won’t connect, restart both the Shark Robot and your router, then try again.
Following these troubleshooting tips resolves the majority of connection problems, ensuring a smooth WiFi setup.
8. Tips for a Smooth Connection
To make the WiFi setup as seamless as possible, keep these tips in mind:
- Update firmware and app: Ensure your Shark Robot’s firmware and the SharkClean app are up to date before beginning the setup. This reduces compatibility issues and unlocks the latest features.
- Use a checklist: Following a step-by-step checklist prevents missed steps and speeds up the connection process.
- Avoid interference: Keep the robot and router away from other smart devices or appliances that may cause signal interference.
By preparing in advance and following these tips, you can minimize setup frustrations and enjoy a smooth connection experience.
9. Additional Resources
For further guidance and troubleshooting, these resources provide detailed instructions and community advice:
- Video guide: YouTube walkthrough — visual step-by-step setup instructions.
- Written guide: Kismac-NG blog — detailed step-by-step written instructions.
- SmartHomeBit troubleshooting: SmartHomeBit guide — common issues and connection solutions.
- Community advice: Reddit discussion — insights and tips from other Shark Robot users.
10. Related Articles / Further Reading
Here are some helpful links and resources that users can follow for deeper guidance:
- Step-by-step Shark robot Wi-Fi setup checklist
https://support.sharkclean.com - How to reset a Shark robot before reconnecting Wi-Fi
https://www.sharkclean.com - Troubleshooting when Shark robot cannot find 2.4GHz network
https://community.sharkclean.com - How to update SharkClean app and firmware before setup
https://www.digitaltrends.com/home/how-to-connect-robot-vacuum-to-wifi - How to move Shark robot into Wi-Fi pairing mode exactly
https://smarthome.guide
11. Conclusion
Connecting your Shark Robot to WiFi opens up a world of smart home convenience, from scheduling cleanings to remote control and automatic updates. To recap:
- Prepare your robot and app.
- Put the robot in pairing mode.
- Connect through the SharkClean app.
- Troubleshoot any connection issues if they arise.
Following this guide, along with the additional resources provided, ensures a smooth and successful setup. Once connected, you’ll enjoy the full benefits of a WiFi-enabled Shark Robot, making home cleaning easier, smarter, and more convenient than ever.
FAQ: Connecting Your Shark Robot to WiFi
1. Can my Shark Robot connect to a 5 GHz WiFi network?
No, Shark Robots typically only connect to 2.4 GHz networks. Ensure you select the correct band during setup.
2. What should I do if my robot won’t enter WiFi pairing mode?
Make sure your robot is fully charged and press and hold the “Dock” + “Max” buttons until the indicator lights blink. If it still doesn’t enter pairing mode, try rebooting the robot.
3. How do I know if my Shark Robot is connected to WiFi?
Once connected, the SharkClean app will display your robot as online. You can also check if remote controls, scheduling, and cleaning history are accessible in the app.
4. My robot keeps losing WiFi connection. What can I do?
- Move the robot closer to the router.
- Ensure the 2.4 GHz network is stable and separate from 5 GHz networks.
- Reboot both your robot and router if needed.
- Verify that the correct WiFi password is entered.
5. Do I need to update the SharkClean app or robot firmware before connecting?
Yes. Updating the app and robot firmware before setup ensures compatibility, smoother setup, and access to the latest features.


