
-

- No Comments
- February 13, 2026
How to find lorex device id
1. Introduction
If you’ve ever tried setting up a Lorex security system, you’ve probably run into one small but crucial detail: the Lorex Device ID. This ID is the digital fingerprint of your DVR, NVR, or camera, and without it, things like remote viewing and app setup can quickly turn into guesswork.
Finding your Device ID matters because it’s required for initial setup, mobile app access, firmware updates, and even technical support. Whether you’re adding your system to the Lorex Home app or troubleshooting an issue, this code is the key that unlocks everything.
In this guide, you’ll learn what a Lorex Device ID is, where it’s usually located, and how to find it directly on your device or its packaging—fast, simple, and without unnecessary detours.
2. What Is a Lorex Device ID
A Lorex Device ID is a unique identifier assigned to each Lorex security device. It allows Lorex apps, servers, and support tools to recognize your specific device and connect it securely to your account.
The Device ID is typically a 12 to 16 character alphanumeric string, made up of letters and numbers. In many Lorex models, this ID is the same as the Serial Number (SN), which means you may see it labeled as either “Device ID” or “S/N” depending on where you’re looking.
Lorex Device IDs are used across multiple products, including:
- DVR systems
- NVR systems
- Standalone Lorex security cameras
No matter the device type, the purpose is the same: identification, connection, and control.
3. Where to Find Lorex Device ID on the Device Itself
3.1 Checking the Physical Label
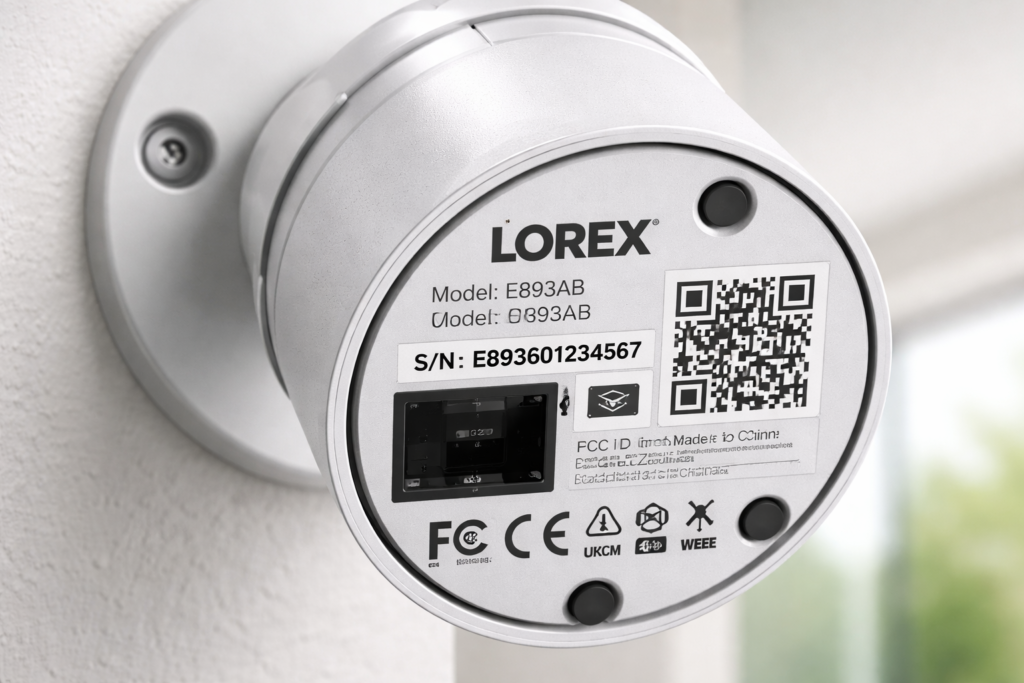
One of the easiest ways to find your Lorex Device ID is by checking the physical label on the device.
- On cameras, look at the base or side of the unit.
- On DVRs or NVRs, check the top panel or bottom panel of the recorder.
- Some models have labels hidden under protective film or covers, so gently peel these back if nothing is visible at first glance.
The label usually includes the Device ID, Serial Number, and a QR code printed together.
3.2 Checking the Packaging and Documentation
If the device label isn’t accessible, the next best place is the original packaging.
- Check the box your Lorex device came in
- Look through the quick start guide or setup manual
Lorex often prints the Device ID and QR code directly on the box or inside the documentation, making it easy to retrieve even if the device is already mounted or installed.
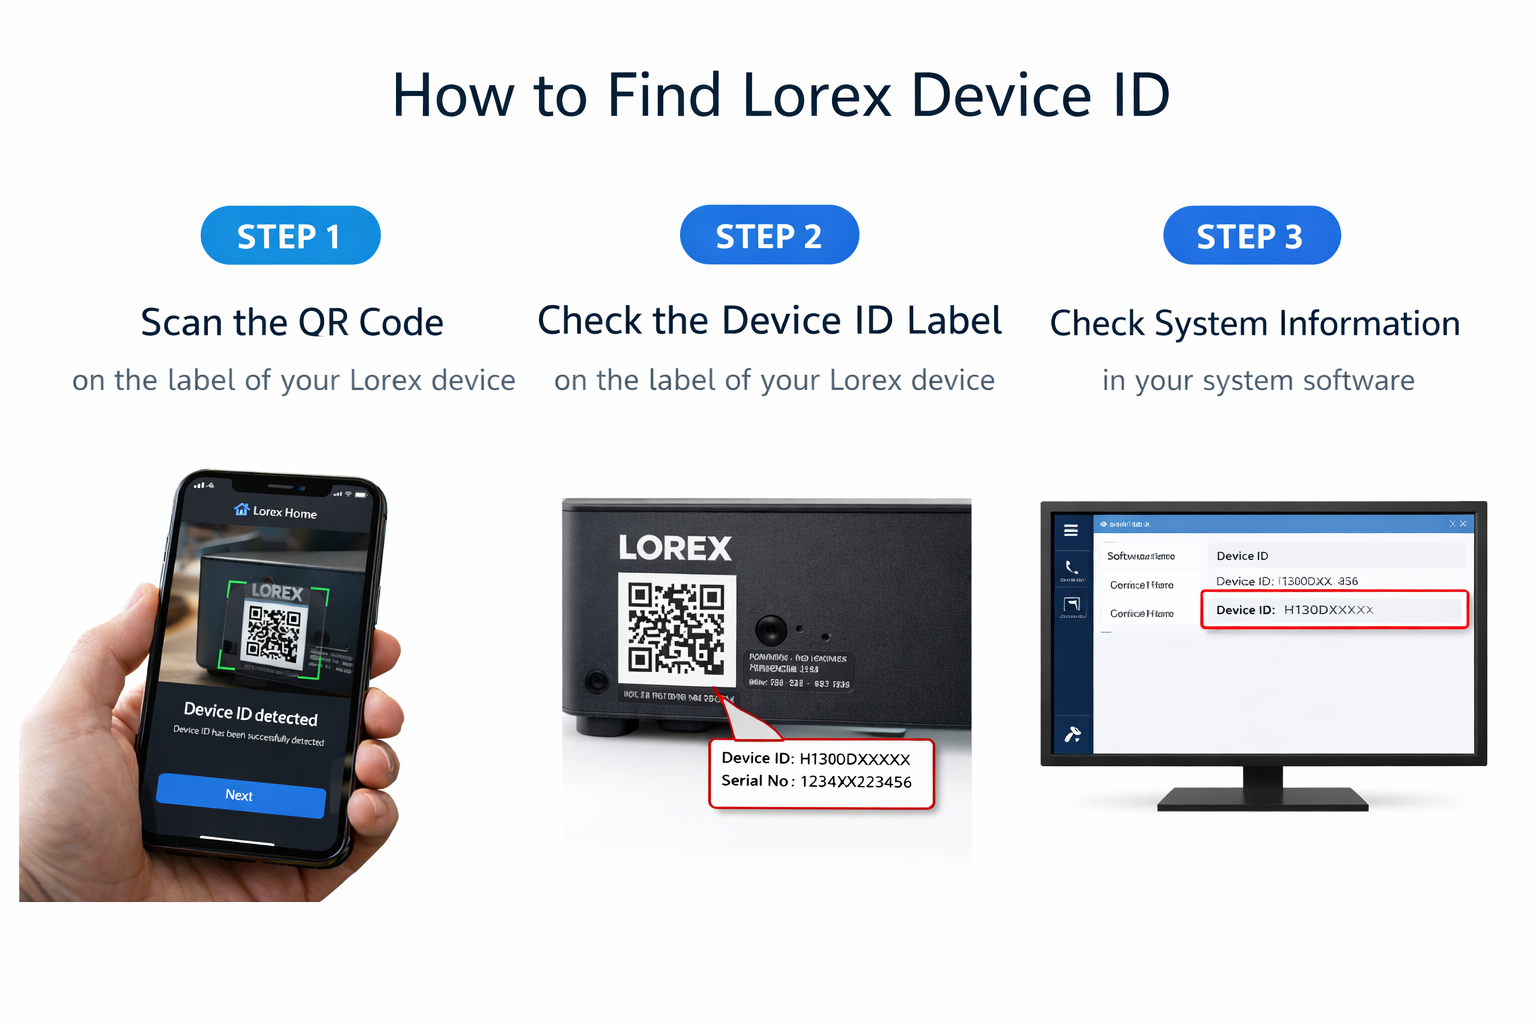
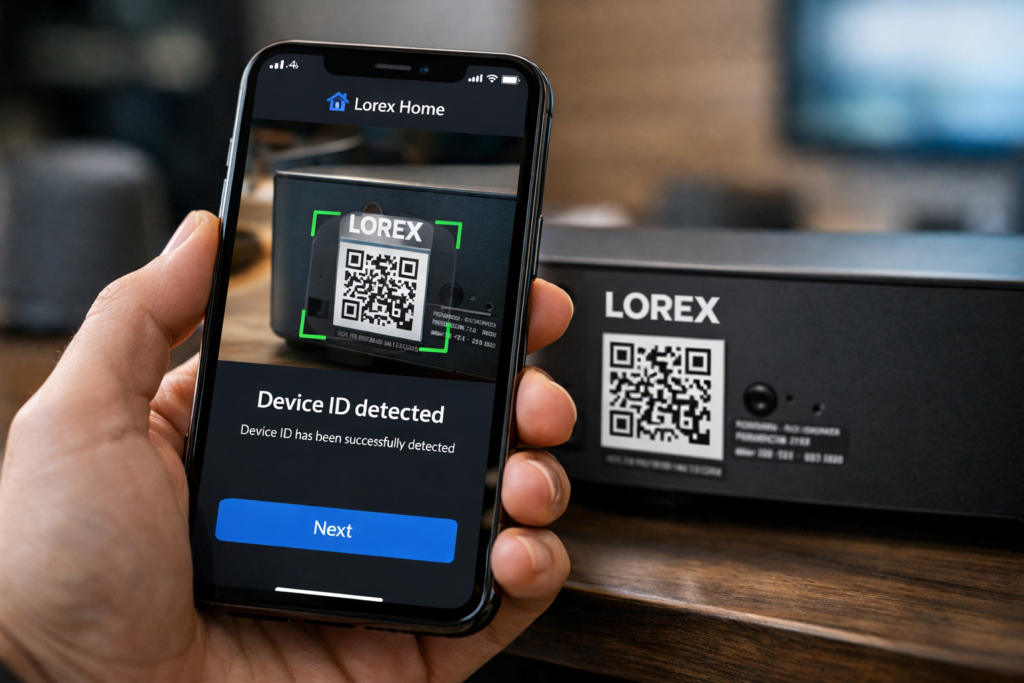
3.3 Using the QR Code
Most Lorex devices include a QR code that contains the Device ID.
By simply scanning the QR code with your smartphone camera or a QR scanner:
- The Device ID is revealed instantly
- No typing or guessing required
- Ideal for fast app setup and device registration
This is often the quickest and least error-prone method, especially when entering the ID into the Lorex Home app.
4. How to Find Lorex Device ID Using the Lorex App
If you don’t want to check labels or packaging, the Lorex mobile app is one of the most convenient ways to find your Device ID. As long as your device is powered on and connected to the network, the app can detect it automatically or reveal the ID through a QR scan.
4.1 Supported Apps
Lorex uses different apps depending on the generation of your device:
- Lorex Home app
This is the official app for current Lorex devices. It supports modern DVRs, NVRs, and smart security cameras and is the most commonly used option today. - FLIR Cloud™ app
Older Lorex systems may still rely on FLIR Cloud™. While it’s no longer used for new devices, many legacy DVR and NVR models display their Device ID through this app.
Using the correct app for your model is essential, as unsupported apps may not detect your device.
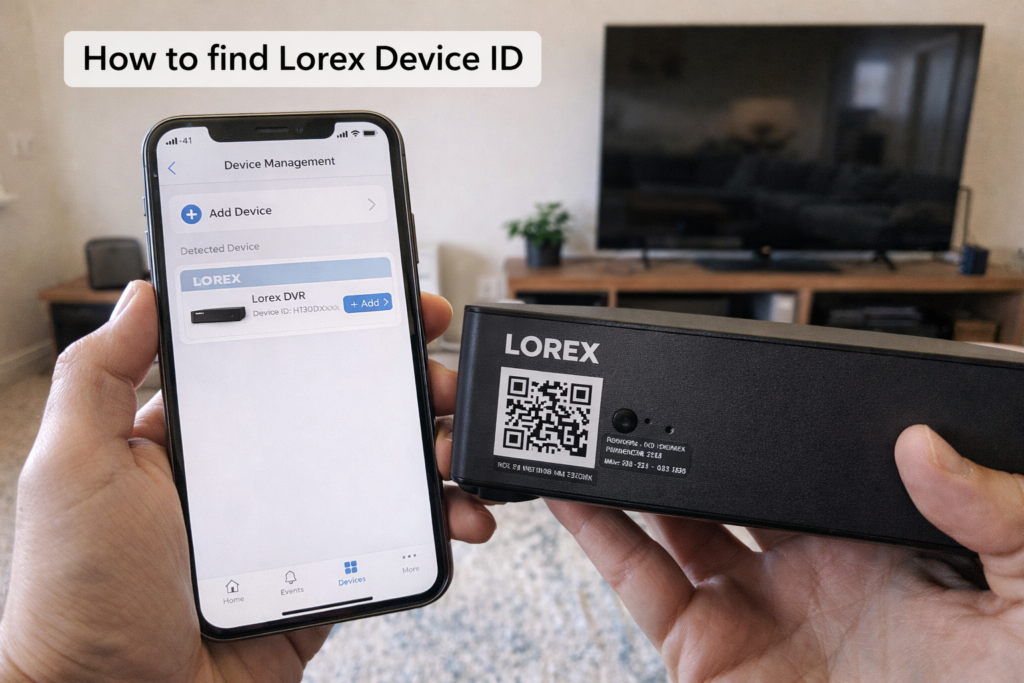
4.2 Steps Inside the App
To find your Lorex Device ID using the app, make sure the following requirements are met:
- The device is powered on
- Your phone and the Lorex device are on the same network
Once ready, follow these steps:
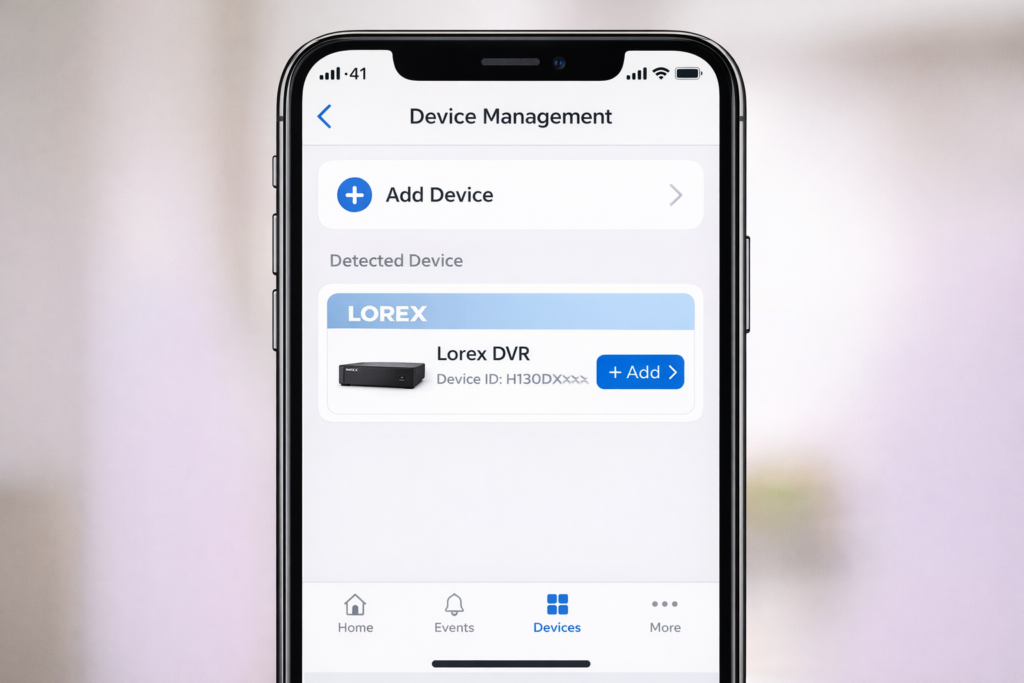
- Open the Lorex Home or FLIR Cloud™ app
- Go to Device Management
- Select Add Device
- Choose Scan for nearby devices to automatically detect your system
- Alternatively, select Scan QR Code and scan the QR code on the device or packaging
When the device is detected or the QR code is scanned, the Device ID is displayed directly in the app, ready to be used for setup or remote access.
5. Finding Lorex Device ID from the DVR or NVR Menu
If you have physical access to your recorder, the system menu provides the most detailed and reliable way to locate the Device ID.
5.1 Accessing the System Information Screen
Start by connecting a monitor to your DVR or NVR. From there, you can access system information using any of the following methods:
- Click the taskbar icon on the screen
- Right-click and open the Quick Menu, then navigate to
Main Menu → System → Info - Press the Enter button on the remote control
- On some models, use the front panel LED or buttons to bring up system details
The exact steps may vary slightly by model, but all methods lead to the system information screen.
5.2 Information Displayed on the Screen
Once inside the System Information section, you’ll see key details about your Lorex device, including:
- Device ID
- IP address
- MAC address
- Model number
- Firmware version
The Device ID is clearly listed, making this method ideal when troubleshooting or speaking with support.
5.3 Series-Specific Variations
Lorex organizes system menus slightly differently across product lines:
- LHA / LNK series
Device ID appears under the System Info section, along with network and firmware details. - LHB series
The System Information screen displays the Device ID and serial number together. - LHV series
Navigation may differ slightly, but the Device ID is still found within the system or information menu, as outlined in the quick guide.
Despite minor layout differences, every series provides access to the Device ID through the system menu.
6. Official Lorex Resources for Finding Device ID
Want verified, model-specific instructions straight from the source? These official resources make it easier to locate your Lorex Device ID across apps, menus, and packaging:
- YouTube guide reference — This walkthrough shows how to find your Device ID via the QR code, app, or device label, step-by-step.
- Lorex Help documentation — Head to the official Lorex Support site for detailed articles on pairing devices and accessing device info in the app: Lorex Support Help Center (pairing with app) and Lorex App: Home Tab & Device Info Guide.
- Series-specific system information pages — Lorex has dedicated support pages showing how to access the Device ID and other info from your DVR/NVR menu for various series:
- LHA / LNK series: LHA / LNK Series System Information (Device ID)
- LHB series: LHB Series System Information (Device ID)
- LHV quick guide PDF — For LHV series devices and other manuals, see the downloadable instructions on the official Lorex site where Device ID and QR code locations are detailed.
Using these official resources ensures you’re following reliable, up-to-date instructions tailored to your exact model.
7. What to Do After You Find Your Lorex Device ID

Once you’ve located your Device ID, you can put it to work for setup, access, and maintenance:
Registering the Device in the Lorex App
Open the Lorex Home or legacy FLIR Cloud™ app and add your device using the Device ID or by scanning the QR code. This links your security hardware to your account for management and viewing.
Enabling Remote Viewing
With your Device ID registered, you can stream live video and playback footage from anywhere using the Lorex app. Remote access depends on proper registration and network setup.
Contacting Lorex Support
If you need help troubleshooting or configuration assistance, support teams may ask for your Device ID so they can identify your specific model and settings quickly. This speeds up resolutions significantly.
Using the ID for Firmware Updates
The Device ID helps you ensure you’re applying the correct firmware for your system. This is especially important for stability, security patches, and compatibility with the latest app versions—whether via the system menu or app prompts.
8. Common Issues When Finding or Using a Lorex Device ID
Even with clear steps, real-world setups can throw a curveball. Here are the most frequent problems users encounter — and why they happen:
Device ID Not Visible
Sometimes the Device ID label is tucked away on the bottom or back of the unit or covered by protective film. If you can’t see it on the device surface, check the original packaging or find it through the system info screen inside the DVR/NVR menu.
QR Code Damaged or Missing
Exposure to weather, mounting screws, or abrasion can damage the QR code sticker that holds the Device ID. When that happens, manually enter the ID from the label into the Lorex app instead of relying on scanning.
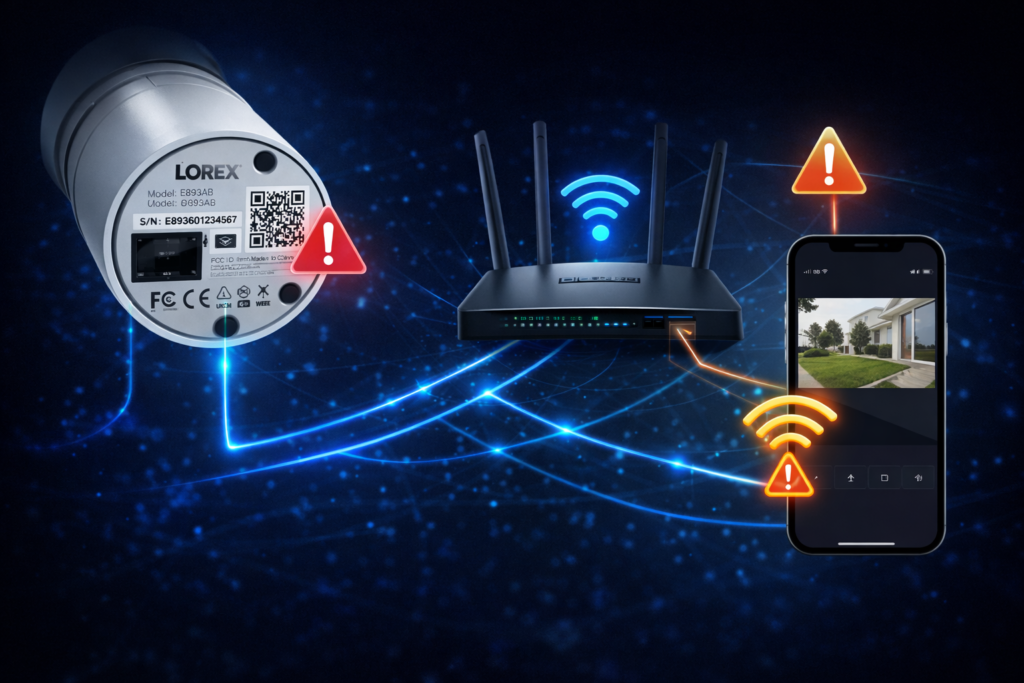
App Not Detecting Device
Lorex Home and FLIR Cloud™ sometimes fail to detect devices if there’s a network mismatch or power issue. Ensuring the device and phone are on the same network and powered on usually fixes this.
Incorrect ID Entered
Device IDs are long alphanumeric strings, and mistyping characters like “O” vs “0” or “I” vs “1” is very common. Using the QR scan in the app when possible helps avoid manual entry errors.
Network-Related Issues
Connectivity hurdles — such as weak Wi-Fi, firewall blocks, or router settings — can prevent the app from recognizing the Device ID or connecting to cloud services even when you’ve entered the correct ID. Checking local network settings often resolves this.
9. Related Guides
Want to go further after finding your Device ID? These guides will help you take the next steps with your Lorex system:
- What is a Lorex Device ID used for — Learn why the Device ID matters beyond setup, including remote access and support.
- How to register a Lorex device using Device ID — A step-by-step on adding your system to the mobile app using the Device ID.
- Steps to reset a Lorex password using Device ID — How your Device ID can help with account recovery or password resets.
- How to update Lorex DVR firmware using Device ID — Ensuring your hardware has the latest fixes and features.
- Fixing common errors when adding Lorex Device ID to the cloud app — Troubleshooting registration and cloud access issues.
You’ll find most of these topics in the Lorex Support Center’s FAQs and help articles, which cover cloud setup, device registration, and technical support procedures.
10. Frequently Asked Questions (FAQ Section Placeholder)
Here are some quick answers to the questions readers often have about Lorex Device IDs — with links to official resources where available.
Is the Lorex Device ID the same as the serial number?
Often, yes — the Device ID frequently matches the serial number on the device label, making it easy to spot.
Can I find the Device ID without a monitor?
Yes. It can be retrieved from the app, the QR code on the device or packaging, or the original documentation.
Does every Lorex camera have a Device ID?
Most Lorex security cameras and recorders designed for remote access include a Device ID that’s required for app and cloud setup.
What if I lost my Device ID?
If the label is lost, check the system info screen via the DVR/NVR menu or use the mobile app to retrieve it. Support can often help if you provide model details.
Is Device ID required for cloud access?
Yes — registering your device with the Lorex Home or FLIR Cloud™ app using the Device ID is essential for cloud and remote viewing.


